How About Orange
Showing posts sorted by relevance for query paper flowers. Sort by date Show all posts

April 20, 2011

Make flowers from crepe paper

Ages ago I bought a package of crepe paper (like this—the folded sheets, not streamers). An impulse purchase simply because... it was orange? The other day I finally made some flowers with it while watching way too much HGTV. These will be nice gift toppers, or maybe I'll do more and make a wreath.

Materials:
Sheet of crepe paper
Small piece of cardstock
Scissors
Glue (I used Aleene's Tacky Glue)
Toothpick

Cut 12 circles from a sheet of crepe paper, any size you like depending on how big you want the final flower to be. I accordion-folded a strip of paper and cut multiple circles at once. No need to be too precise; freehand circles will do.

Orient each petal so the grain in the paper runs vertically. Apply a bit of glue at the bottom of the petal and pinch it to create small gathers. When the glue has dried, press both thumbs into the center of each petal and stretch the paper to curl the edges inward, forming a bowl shape.

Cut out a small circle of cardstock (about the same size as the petals before you shaped them.) Glue five petals around the outside edge. Then stagger four petals inside that ring, followed by three petals in the middle.

To make a center for the flower, cut a small strip of crepe paper and fold it in half. Cut notches along one long edge of the doubled paper to make fringe. Roll the fringed paper around a toothpick and secure with glue. Finally, glue this piece into the center of the flower.

October 08, 2010

How to make recycled paper flowers

I learned to make paper flowers a long time ago with directions from a library book. They don't require any adhesive, and there are just four shapes to cut out.

Use them to decorate gifts or make wreaths. I chopped up a fancy Urban Outfitters catalog for these.

You can make template pieces to trace around and then cut out the shapes with a scissors—what I used to do. But this seemed like a good test for the Silhouette cutter, so I recreated the pattern pieces in Illustrator on my Mac and commanded the machine to cut them for me. It took about fifteen seconds to cut the parts for one flower. Whoa. I shall never return to my primitive, scissors-wielding caveman ways.

If you'd like to download PDF templates, get the large flower here and the small flower here.

To cut with a Silhouette machine, download a .dxf file here. (I exported it from Adobe Illustrator.) You should be able to open it and cut from Silhouette Studio.

To make the flowers, do the following:

1. Score the back of each petal along the lines shown in pencil, above.

2. Pleat the petals along the scored lines, always folding in the same direction.

3. Fold the triangle portion of the stem in half lengthwise. Do this two more times until it reminds you of a toothpick.

4. Using a chopstick or skewer, roll the "flag" portion of the stem toward the "toothpick." This curl will form the center of the flower.

5. Curl the ends of each petal backward to give them shape.

6. With a skewer or sharp pencil, poke a hole in the center of each flower piece.

7.Thread the pieces onto the stem, from smallest to largest. Finished!

February 15, 2007

Paper flowers

I made this (and the card version a couple posts ago) based on the easy instructions in the book Paper Flowers, checked out from my local library. This seems like a useful skill. And it's all just paper here. No wire, no glue. I bet it would be nice to decorate presents with them.

November 15, 2011

How to make 3D paper ball ornaments

I love 3D paper things. Love. And when I saw a little picture of what appeared to be paper balls in a CB2 catalog, I thought, "I am going to make those."

So the other day while Alex was writing a paper about mysterious things like polymers and flexible films and tactoids, I made a paper ball. Then I proudly announced I had created a tactoid and it was sitting on my desk. He giggled. Apparently a tactoid is not a paper ball.

These are made from 12 slotted flower shapes that fit together to form a sphere. No adhesive needed; the only ingredient is paper. I made a template in Illustrator and cut out the shapes with my Silhouette machine, but you could also print out the pages and cut by hand instead.

Download the PDF templates here:
Large ball (10")– print/cut 12 sheets
Medium ball (5")– print/cut 2 sheets
Small ball (3")– print/cut 1 sheet

Download a Silhouette .studio file here:
Small ball (3")– unzip the file; cut 1 sheet. (The shapes can be scaled up or down in Silhouette Studio if you'd like to change the size.)

If you want to hang your ornament, you might like to add the string before assembling the ball. I placed a piece of tape on the back of one flower so the hole wouldn't tear, then used a needle to pull string through, forming a loop on the front side. I secured the ends of the string on the back side with another piece of tape.

Use the slits to join petals together. Keep adding shapes, connecting as you go, so that every petal is connected to another petal on a neighboring flower.

It might be helpful to think of the first piece as the "north pole," and then add a row of five flowers encircling it. At this point, the ball is half finished.

Here's what it looks like upside-down:

Attach the next row of five flower shapes, and finally, add the "south pole" piece to finish the globe.

The colored balls are made from regular-weight computer paper (Astrobright from Office Max) and the white balls are made with cardstock. The big sphere is the size of a basketball; the little one is approximately a baseball. And the medium-sized guy is maybe a large grapefruit.

June 11, 2009

Newspaper flowers

I'm still on the newspaper kick. I picked out the parts with colored ads and made these flowers with instructions from the book Paper Flowers by Michael LaFosse. Found it at the library. These are made with two pages of newspaper glued together to make a thicker sheet.

There they are, adorning the newspaper basket.

January 14, 2011

Fabric flower tutorial

A few people asked how to make the flower on yesterday's fabric origami box. This is an easy craft project that's a good way to use up scraps. Use these flowers to make hair pins and boutonnieres, top gifts, decorate napkin rings, tote bags, wedding aisles, you name it.


You'll need some stiffened fabric pieces (see this post for the how to), a pencil, paper, scissors, needle, thread, buttons, and an iron.

With a pencil, sketch flower shapes on the back of your fabric pieces. You'll need three sizes of flowers, so make each one progressively larger. If you plan to make zillions of flowers, it might be good to draw yourself some paper templates to make your life easier. Don't worry about making perfect petals. This is a forgiving project.

Cut out each flower piece. Then pinch little creases between the petals, overlapping them very slightly to add dimension.

Press the creases with an iron. While each petal is still warm, roll the edges back to make a pretty petal shape. The fabric is very soft and pliable when it's warm, but after it cools a couple seconds, it's crisp again. If you're unsatisfied with a petal, just iron it again and reshape it.

Layer three flower shapes in graduated sizes, staggering the petals. Stitch them together with a button in the center.

I love how sturdy these are—crisp and flexible, all at the same time. They won't tear like paper, and they have a fabric texture. Nifty!

September 21, 2012

Using polycrylic coating on origami

I've been wondering what kind of protective coating to use on origami, paper jewelry, or other paper projects—something that would make the finished model sturdier, more water-resistant, and maybe a little bit shiny.

I've tried applying a couple coats of Krylon Satin Finish spray, but it didn't seem to have much effect. (Good if you just want to preserve the finish and texture of your paper and protect it a bit from dust, though.) I've also tried clear nail polish, but it didn't create the coating I was looking for.

This was my latest experiment: Minwax Polycrylic, purchased at Home Depot. I got the semi-gloss after standing in the aisle paralyzed, trying to decide whether I wanted a glossy or satin finish. So I aimed for the middle.

I tested the stuff on these origami sakura blossoms I folded from 2" squares of plain computer paper. Get a tutorial for the flowers here! After glueing the petals together, I also glued the loose flaps down to make them extra secure.

Then I painted them with lots of coats of polycrylic, letting the layers dry for an hour or two between coats. I think I applied six. The first coat will cause the folds to relax a little, so be attentive and make sure you reshape the flower a bit if needed before the coating dries. It was helpful to stick them on skewers to dry.

The polycrylic built up a nice, shiny coating and dried crystal clear with no brush strokes at all. The flowers are slightly flexible, but really tough, as if they were laminated with clear plastic or packing tape. Mission accomplished!


I hot-glued magnets to the back and stuck them on my file cabinet.

For other coating and glaze ideas, see the helpful tips from readers in the comments on this post!

October 05, 2012

More metallic foil exploits, with free printables

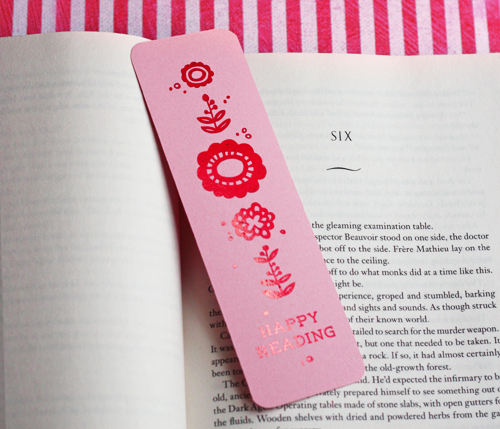
I experimented some more with the laser toner reactive foil I got from Decal Pro FX. I ironed the foil onto black laser prints on colored cardstock to make these bookmarks and cards.

See this post for a more detailed how-to. I did everything the same way, except this time I used Decal Pro's carrier board as my ironing surface. I think this worked slightly better than chipboard since it's very smooth and doesn't warp when heated.

I reused the little flowers I'd drawn and scanned for the printable business card project here.

I like the foil best on dark paper, since the metal contrasts nicely when it gleams. Plus dark paper hides any tiny specks of toner that aren't covered by foil. Laser printing on the black cardstock worked well, though the flowers looked a little blotchy and strange (above). But the foil still adhered well.

I guess I'm easily amused, but peeling it off is totally thrilling.

This time I tried a two-color design. I printed out just the parts that would get the first color, then ironed silver foil on.

Then I ran the foiled paper through the printer again, printing just the leafy stems this time. I ironed gold foil onto those. Foil won't stick to itself, so no gold got into the silver. The smooth, mirror-like surface of the silver foil did get a teensy bit duller or more textured on its journey through the printer, but that's barely noticeable.

If you'd like the files I used, feel free to download:
Printable bookmark PDF
Printable birthday card PDF (This file is three pages. Print only the page you need at 100%: first color page, second color page, or the entire design.)

Purchase individual foils or a sampler pack right here.

April 16, 2010

Essential life skill: toilet paper origami

Essential life skill #2: folding toilet paper into pleasing shapes. This might be even more essential than making paper straw wrappers into flowers—just imagine all the joy you could spread during your countless opportunities to do this. Leave a surprise in the bathroom of your dinner party host. (No! I mean a nice surprise.) Or delight the next visitor who enters that public restroom stall. In just 60 seconds, you can make someone else's life worth living.

To learn some easy toilet paper folding techniques, go here. I tried this one, above. And when you've mastered these, you can get this book. Note: my thick Cottonelle worked okay for this design, but cheap, crisp public restroom tissue would be ideal. Now go forth and beautify bathrooms everywhere.

June 20, 2007

Some things you can make

Lenticular images from Photojojo
Fabric flowers at Wise Craft
A patchwork notebook cover from Craft Apple
Paper airplanes by Christian Lowe and John Collins at a site found by Paper Forest
A fabric wallet at Blissful
Huge paper pom-poms at Martha Stewart (perfect for party decor)
Fabric-covered wall panels at Bella Dia

February 17, 2014

We gift wrapped the dining room


The dining room wallpaper is finished. It almost killed us, but we prevailed. Remember when my plan was to do just an accent wall? After living with it for a couple weeks, we decided the rest of the room looked too stark and incomplete. So we bought more.

We painted the white ceiling light gray and added paper to the other walls. It took two Saturdays and a couple late nights after work to do the remaining three walls, because we are possibly the slowest wallpaper hangers in history. And one of us is an annoying perfectionist. This room has two windows, a fireplace, and five doors to maneuver around, with rosette blocks that stick out on the corners just to add some extra pain and suffering.


Painting the ceiling was a challenge since we didn't want to get paint on the wall that was already done. I had nightmarish visions of turning it into a Jackson Pollack mural, so we tried to tape a plastic sheet over it. The painter's tape wouldn't stick on the painted walls, however; the plastic was too heavy. Alex had a roll of plastic film from work, so we decided to try that, thinking that taping up strips would be easier since they'd be lighter. To our amazement, the stuff clung to the wall with static electricity alone. This discovery was the greatest moment in our entire project. We couldn't stop high-fiving. It was how Ben Franklin must have felt.

With a tiny brush I carefully painted the ceiling along the edge of the wallpaper, and then the rest of the painting was easy. We didn't spill a drop on the plastic. Figures.

Then came the marathon wallpaper application, and here we have it:


It's cozy and pretty and dramatic. I love it. I'm more of a minimal girl at heart, but in a Victorian house, you have to have some fun.

For Valentine's Day Alex bought me flowers that match the paper. That might seem like no big deal, but God and I both know how much he detested doing this project with me. Trust me: that gift was an amazing act of self-sacrifice.

A more modern light fixture is in the works, along with some artwork and a painted dresser. We're coming down the home stretch in here!

P.S. The paper is Sophie Conran's Balustrade in Claret. It was on sale when I bought the second batch, so if you need to have some, maybe a discount will come along.

January 12, 2011

How to stiffen fabric

I've always wanted to experiment with stiffened fabric, so I picked up a bottle of the aptly named Stiffen Stuff at Michaels.

I sprayed both sides of a piece of quilting weight fabric until it was thoroughly wet. And then, because I'm an impatient girl who gets fed up with air drying, I laid the fabric on a paper towel and microwaved it for 30 seconds. It came out crisp like a sheet of paper! I pressed it for a couple seconds with an iron to smooth out any bumps, and voila.


Stay tuned for projects with stiffened fabric!

Updated project list:
Fabric origami box
Fabric flowers
Valentine heart garland
Fabric wall decals
Origami business card case